In the article “Android – Create Force Update App Module in 30 minutes“. I will be using the firebase remote config for the app force update module.
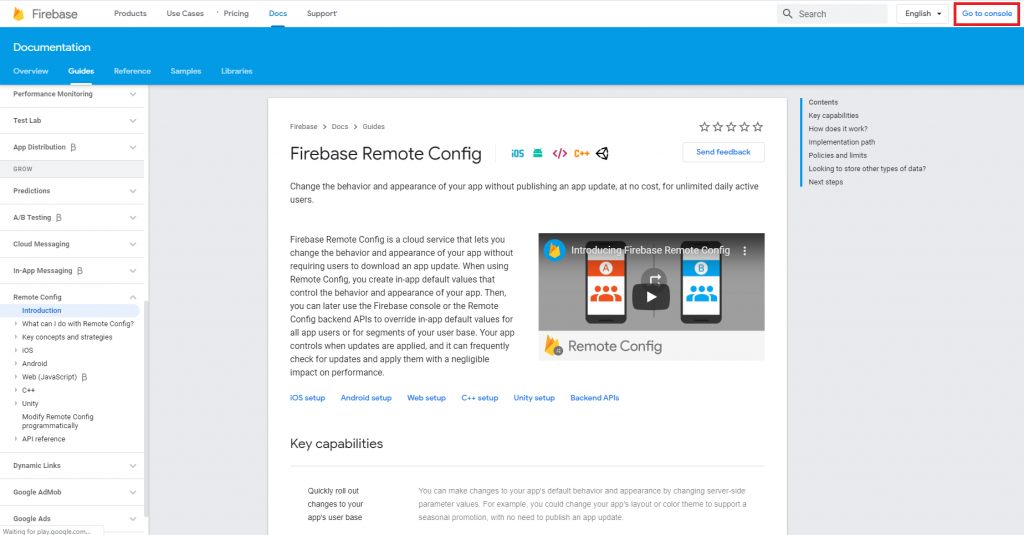
First, navigate to Firebase and login with your Google account. Once signing will be done you will be able to see Go to Console on the right top corner of the page.
After entering into the console you will have to create a new project. Click on the Add Project button.
Now on the next screen, you have to enter the project name and click on Continue to move further.
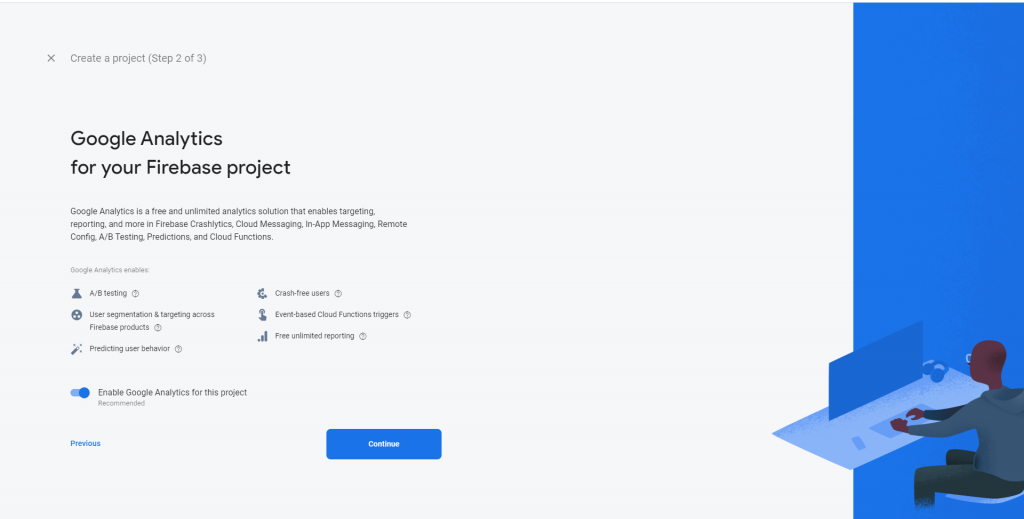
On the next screen, You will be asked to enable google analytics on your project it is by default enable so just click on continue to move further.
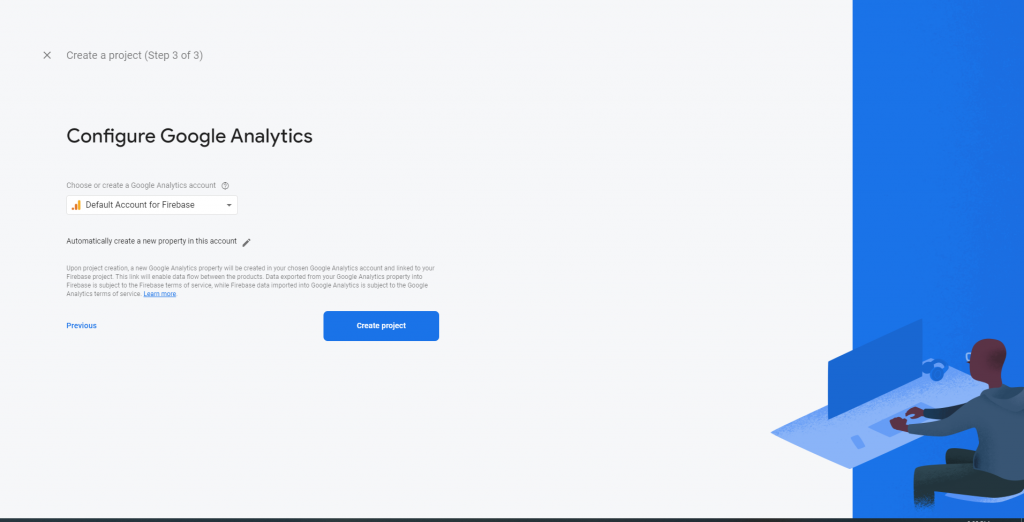
Then on the next screen, you will be asked to select google account for google analytics. Select default account for Firebase if you don’t have already created an account. Otherwise, in the drop-down you will see your other account. For this example, I am using the default Firebase account.
After this screen you will be redirected to another screen

Once your project has been created. Then click on Add App and then you will get a new screen to register your APP.
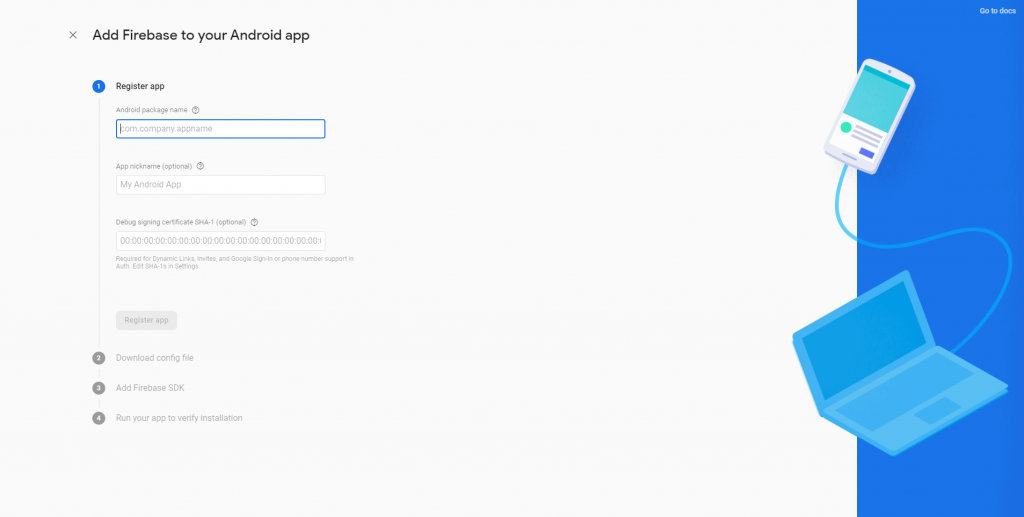
The above steps are self-explanatory so I am not getting into deep. At last, you will get google-services.json file that you need to place on your project’s app root folder.
To set up the remote config app environment for this app. Please check-out the following tutorial.
// To setup firebase related configurations private void setup() { config = FirebaseRemoteConfig.getInstance(); FirebaseRemoteConfigSettings settings = new FirebaseRemoteConfigSettings.Builder().setMinimumFetchIntervalInSeconds(60). build(); config.setConfigSettingsAsync(settings); // Setting Defaults for remote config config.setDefaultsAsync(R.xml.remote_config_defaults); }In the above code, I am setting up the remote configuration.
This includes following -:
- Initializing FirebaseRemoteConfig Object
- Setting MinimumFetchInterval time
- Applying those settings to for remote config using setConfigSettingsAsync
- Then setting defaults XML file for using setDefaultsAsync
The method setMinimumFetchIntervalInSeconds is very important which is used to set the time for fetching the remote changes. In this example, I am setting it to 60 seconds. It depends on you what interval time you want to give as per your app requirement you can increase or decrease time.
In remote config, we create an XML file for setting the default value. This can be done in two ways.
1. Programmatically by using Map.
2. Using the XML file in the resource folder.
For the sake of simplicity, I am using an XML file
remote_config_defaults.xml
<?xml version="1.0" encoding="utf-8"?><defaultsMap> <entry> <key>version</key> <value></value> </entry> <entry> <key>release_notes</key> <value></value> </entry></defaultsMap>This is how you declare the default values. In this example, I am not using any values as default values.
private void checkVersion() { // setup callback to fetch and activate remote configurations config.fetchAndActivate().addOnCompleteListener(MainActivity.this, new OnCompleteListener<Boolean>() { @Override public void onComplete(@NonNull Task<Boolean> task) { if(task.isSuccessful()) { // If task is successful then get name and version String version = config.getString("version"); String release_notes = config.getString("release_notes"); Log.d(getPackageName(), "Version: " + version); Log.d(getPackageName(), "Whats New: " + release_notes); // Display Force update dialog displayAppUpdateDialog(version, release_notes); } else { // If fetch failed then show a toast message Toast.makeText(MainActivity.this, "Fetch Failed", Toast.LENGTH_SHORT).show(); } } }); }The above code doing following things:
- Calling fetchAndActivate() method and then checking the result.
- If the Above request is successful then checking it with isSuccessful() method.
- Then fetching the values using getString() method by passing keys (the key that we mentioned in an XML file and calling displayAppUpdateDialog to show a dialog.
- We have also added else condition to notify the user in case if the request failed using toast message
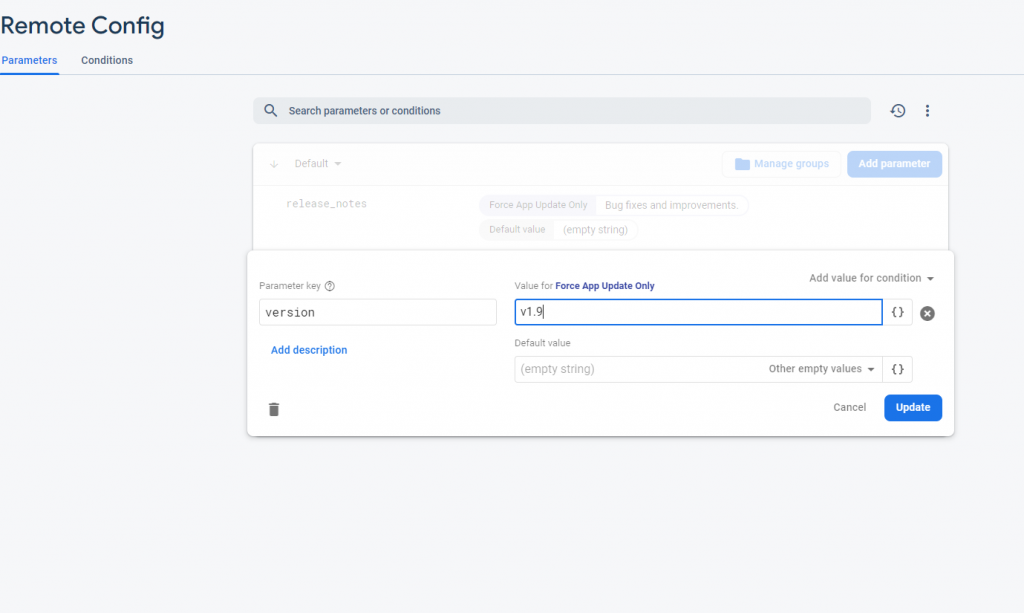
Now navigate to remote config comes under Grow section. And click on Add Parameter to create remote configurations. You will get a dialog that contains Parameter Key where you will enter your key which you have specified in your remote_config_defaults.xml file.
The second thing is the Default Value. Either you can specify any string here (text) or leave it as empty. For this example, I am leaving it as an empty string as the default value.
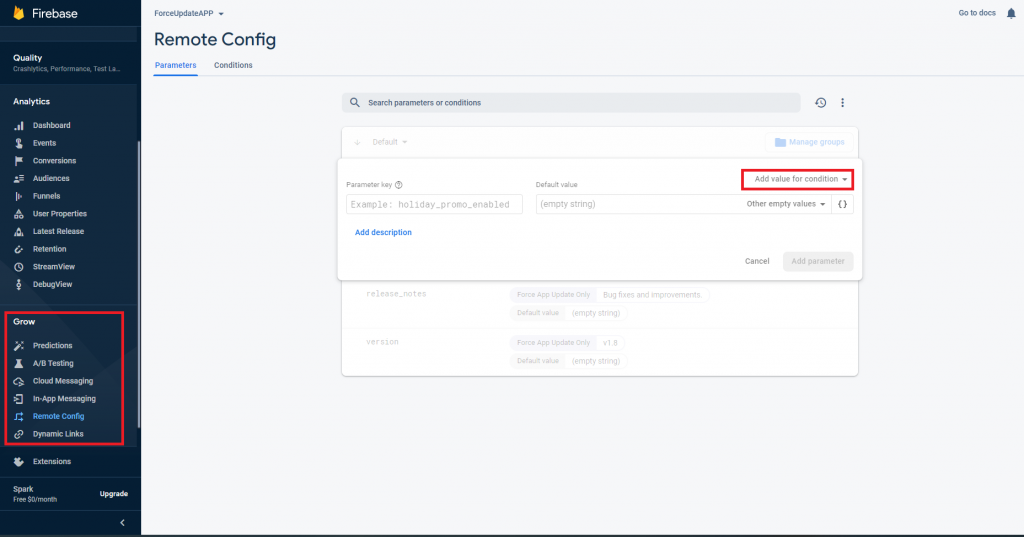
Now you have to enter your new value for your key. To do this click on Add value for condition and a new dialog appears on the screen.
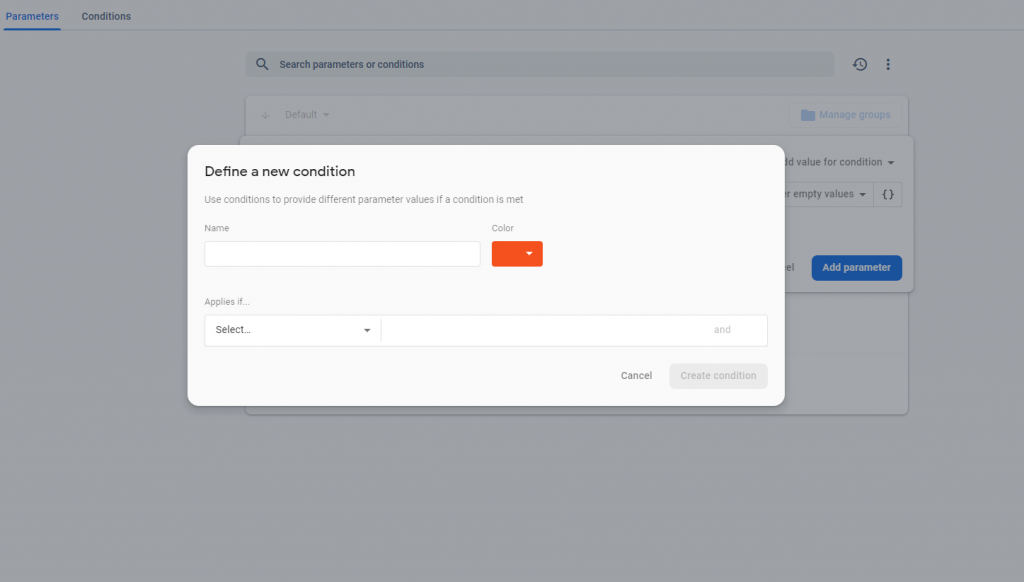
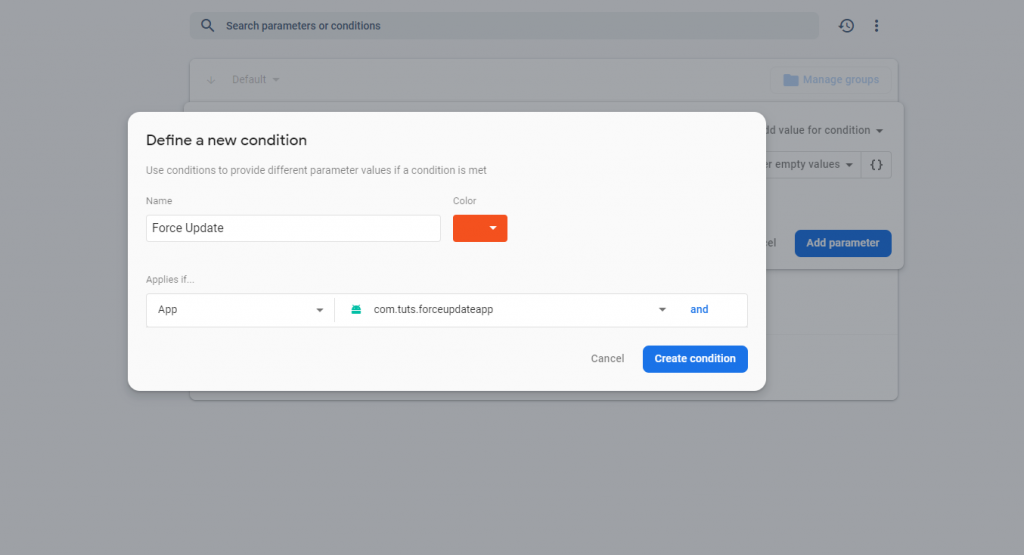
Here you will have to enter the name of your app. It could be anything.
Next, click on Applies If and select App from the dropdown dialog and then select the app from the right side dropdown.
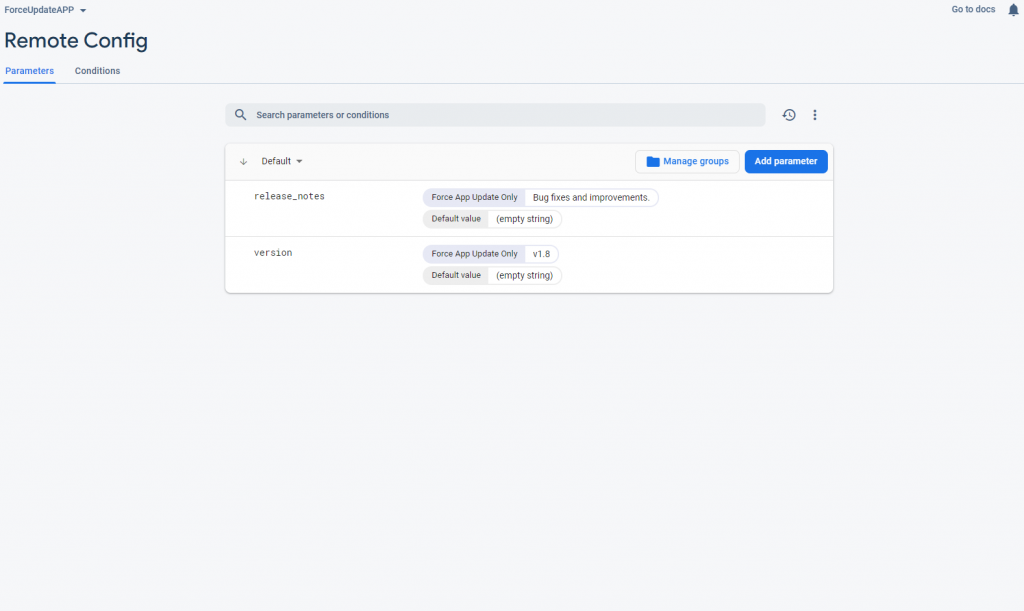
Once we have created the conditions all you need to do is run the application and you should see the dialog with default values.
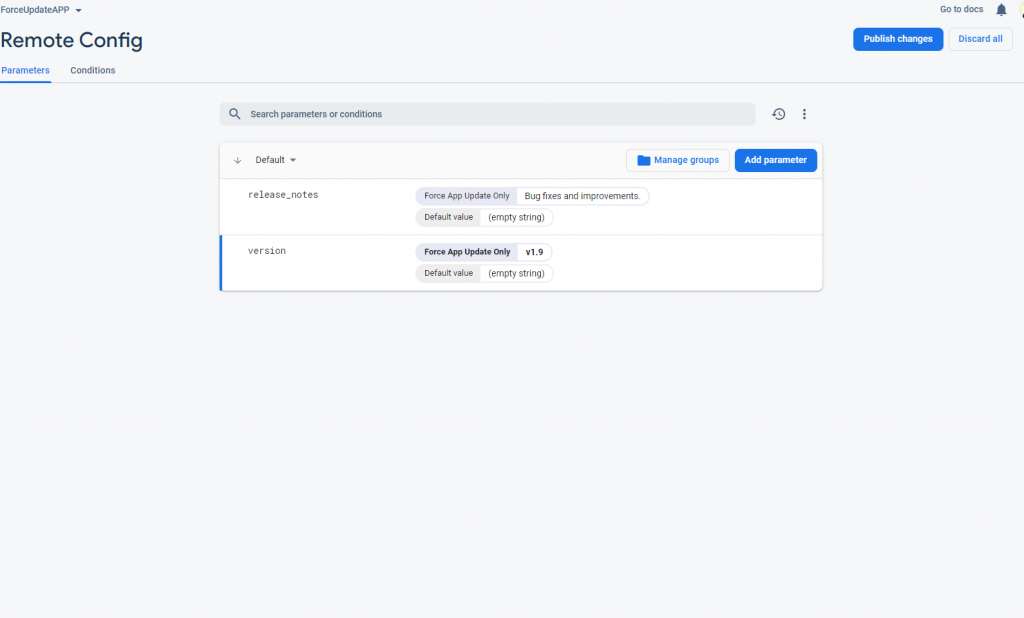
Go back to the console and click on the version key and update its value to v1.9 (example) and click on update to close the dialog.
Now click on publish changes and run your app. You should see the result.
AndroidManifest.xml
<uses-permission android:name="android.permission.INTERNET" />MainActivity.java
package com.tuts.forceupdateapp;import androidx.annotation.NonNull;import androidx.appcompat.app.AlertDialog;import androidx.appcompat.app.AppCompatActivity;import android.content.DialogInterface;import android.os.Bundle;import android.util.Log;import android.widget.Toast;import com.google.android.gms.tasks.OnCompleteListener;import com.google.android.gms.tasks.OnFailureListener;import com.google.android.gms.tasks.OnSuccessListener;import com.google.android.gms.tasks.Task;import com.google.firebase.remoteconfig.FirebaseRemoteConfig;import com.google.firebase.remoteconfig.FirebaseRemoteConfigSettings;import java.io.IOException;public class MainActivity extends AppCompatActivity { private FirebaseRemoteConfig config; @Override protected void onCreate(Bundle savedInstanceState) { super.onCreate(savedInstanceState); setContentView(R.layout.activity_main); setup(); checkVersion(); } // To setup firebase related configurations private void setup() { config = FirebaseRemoteConfig.getInstance(); FirebaseRemoteConfigSettings settings = new FirebaseRemoteConfigSettings.Builder() .setMinimumFetchIntervalInSeconds(60) .build(); config.setConfigSettingsAsync(settings); // Setting Defaults for remote config config.setDefaultsAsync(R.xml.remote_config_defaults); } private void checkVersion() { // setup callback to fetch and activate remote configurations config.fetchAndActivate().addOnCompleteListener(MainActivity.this, new OnCompleteListener<Boolean>() { @Override public void onComplete(@NonNull Task<Boolean> task) { if(task.isSuccessful()) { // If task is successful then get name and version String version = config.getString("version"); String release_notes = config.getString("release_notes"); Log.d(getPackageName(), "Version: " + version); Log.d(getPackageName(), "Whats New: " + release_notes); // Display Force update dialog displayAppUpdateDialog(version, release_notes); } else { // If fetch failed then show a toast message Toast.makeText(MainActivity.this, "Fetch Failed", Toast.LENGTH_SHORT).show(); } } }); } private void displayAppUpdateDialog(String version, String whats_new) { AlertDialog.Builder builder = new AlertDialog.Builder(MainActivity.this); builder.setTitle("New Version: " + version); builder.setMessage("Whats New: \n" + whats_new); builder.setPositiveButton("Update", new DialogInterface.OnClickListener() { @Override public void onClick(DialogInterface dialog, int which) { Toast.makeText(MainActivity.this,"Update Started", Toast.LENGTH_SHORT).show(); } }); builder.setNegativeButton("Cancel", new DialogInterface.OnClickListener() { @Override public void onClick(DialogInterface dialog, int which) { dialog.cancel(); } }); AlertDialog dialog = builder.create(); dialog.show(); }}If you have any queries to remote config then leave your comments below. I will try to solve your queries.
Thanks for reading 🙂 🙂
"Great insights! Your explanation of 3D product configurator services is clear and very useful.
ReplyDeleteThis technology truly boosts customer engagement and product visualization.
Thanks for sharing such valuable information!"